I.P. Admission
Admit a registered patient to a ward and a bed. The admission gets an I.P. No. (in-patient number). The ward charges, the bills of the stay, the ward chart and the final bill all follow that number.
Register first
Only a registered patient can be admitted. A new patient is first registered with New O.P. Registration, or with the quick registration of Find Patient in an emergency.
Admit a patient
The quickest way: find the patient in Find Patient and click Admit. The admission form opens with 1 the patient and 2 the doctor the patient is registered with already filled in:
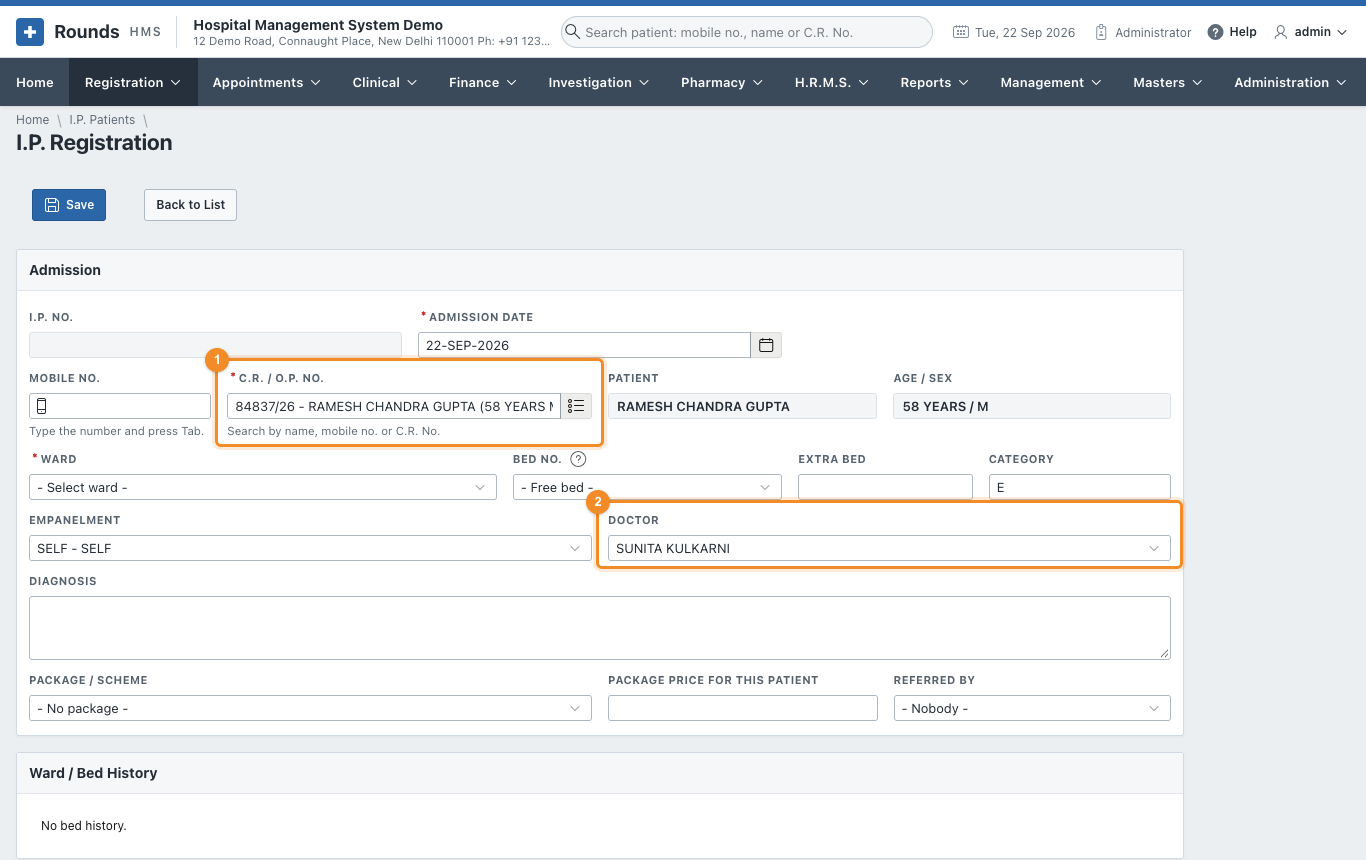
Or open Registration > I.P. Admission and choose the patient yourself:
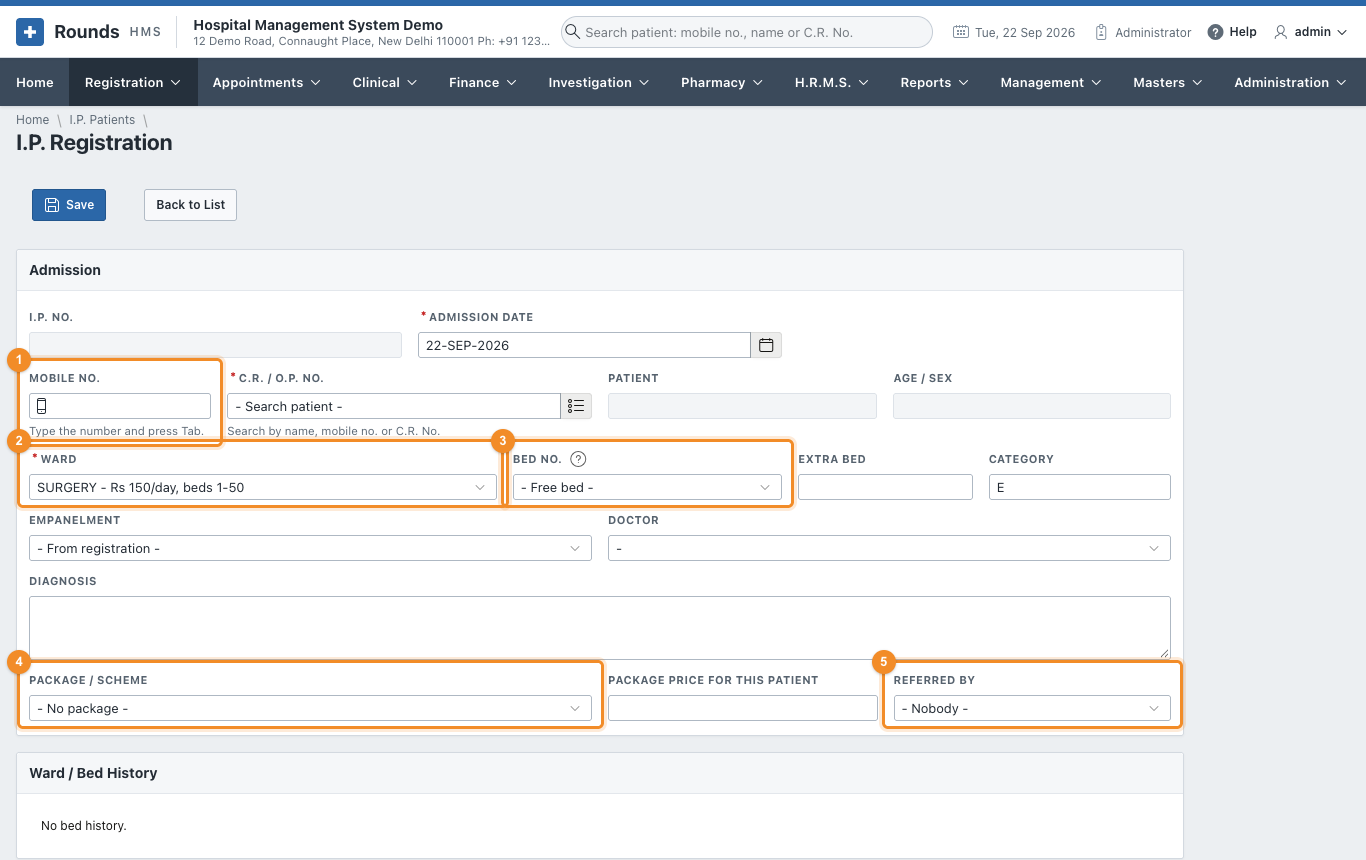
- 1 Type the Mobile No. and press Tab, or search the C.R. / O.P. No. The patient's name, age and sex appear.
- Check the Admission Date (today by default).
- 2 Ward: the list shows the rate a day and the range of bed numbers of every ward.
- 3 Bed No.: choose from the list. It holds only the free beds of the ward chosen (and a bed kept for this patient, marked kept for this patient), so a bed cannot be typed wrong or given to two patients. The Bed Board shows every bed of every ward.
- Category, Empanelment (the insurer, TPA or company that pays, or SELF) and Doctor. For an insurer, the Insurance part of the form opens below.
- Diagnosis: the reason for admission.
- 4 Package / Scheme: for a package such as a normal delivery, choose it here. Package Price for This Patient starts at the package's price and can be changed. The I.P. final bill then charges the package instead of the items it includes.
- 5 Referred By: the clinic or doctor who sent the patient.
- Click Save. The admission gets its I.P. No.
Next, take an advance from the patient in Finance > Advance Receipts.
An insured patient
When the Empanelment is an insurer, a TPA or a scheme (anything but SELF), the form shows Insurance:
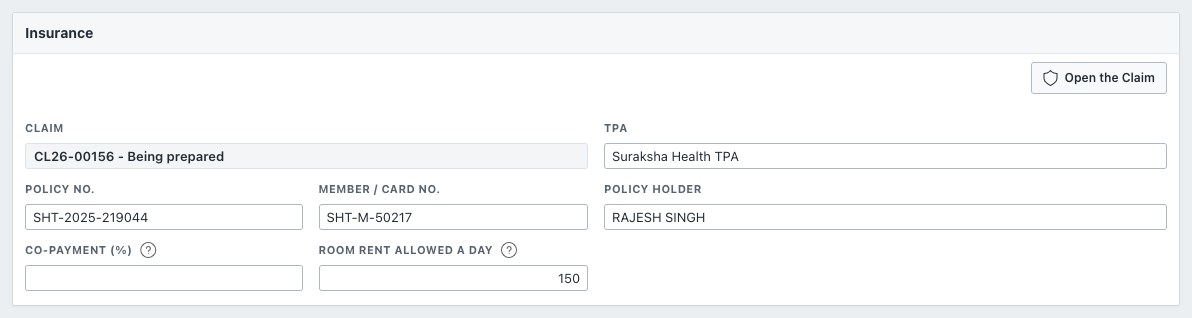
- The Insurer: a warning appears at once if the insurer is marked inactive, or its contract (in Masters > Empanelled Companies) has ended or not yet started.
- Claim: its number and where it stands. Open the Claim opens it in Insurance Claims.
- TPA, Policy No., Member / Card No. and Policy Holder, from the patient's card.
- Co-payment (%): the share of the bill the policy leaves to the patient, if it has one.
- Room Rent Allowed a Day: the room rent the policy pays a day, if it has a limit. A dearer ward's difference is then the patient's.
Save opens the claim of the admission by itself, with these details. If a claim was already opened for this patient before the admission (a planned operation), that claim is joined to the admission instead, with everything it already has.
The co-payment, the room-rent limit and the approved amount are what the I.P. final bill uses to divide the bill between the insurer and the patient.
An admission in progress
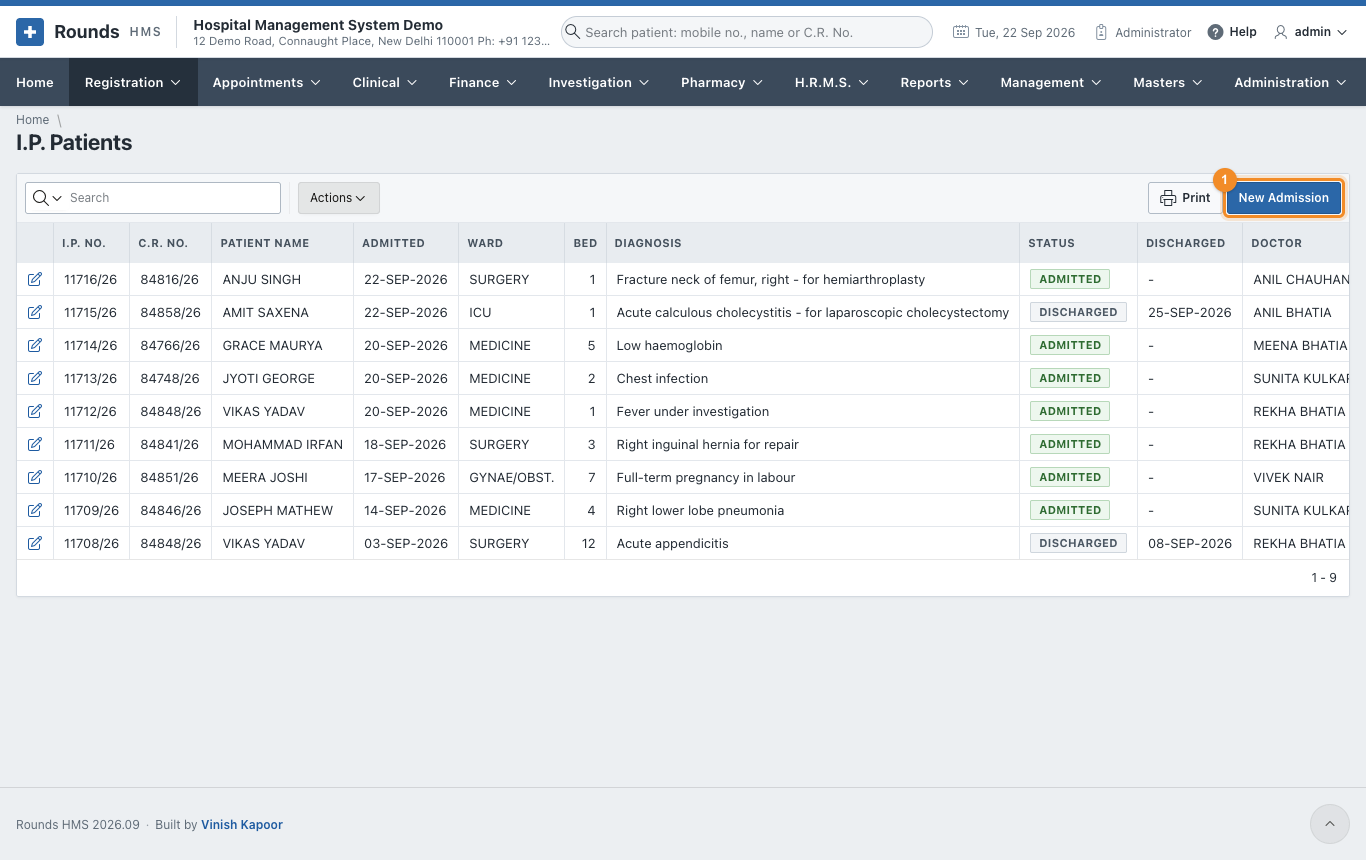
Open Registration > I.P. Patients and click the pencil of the patient:
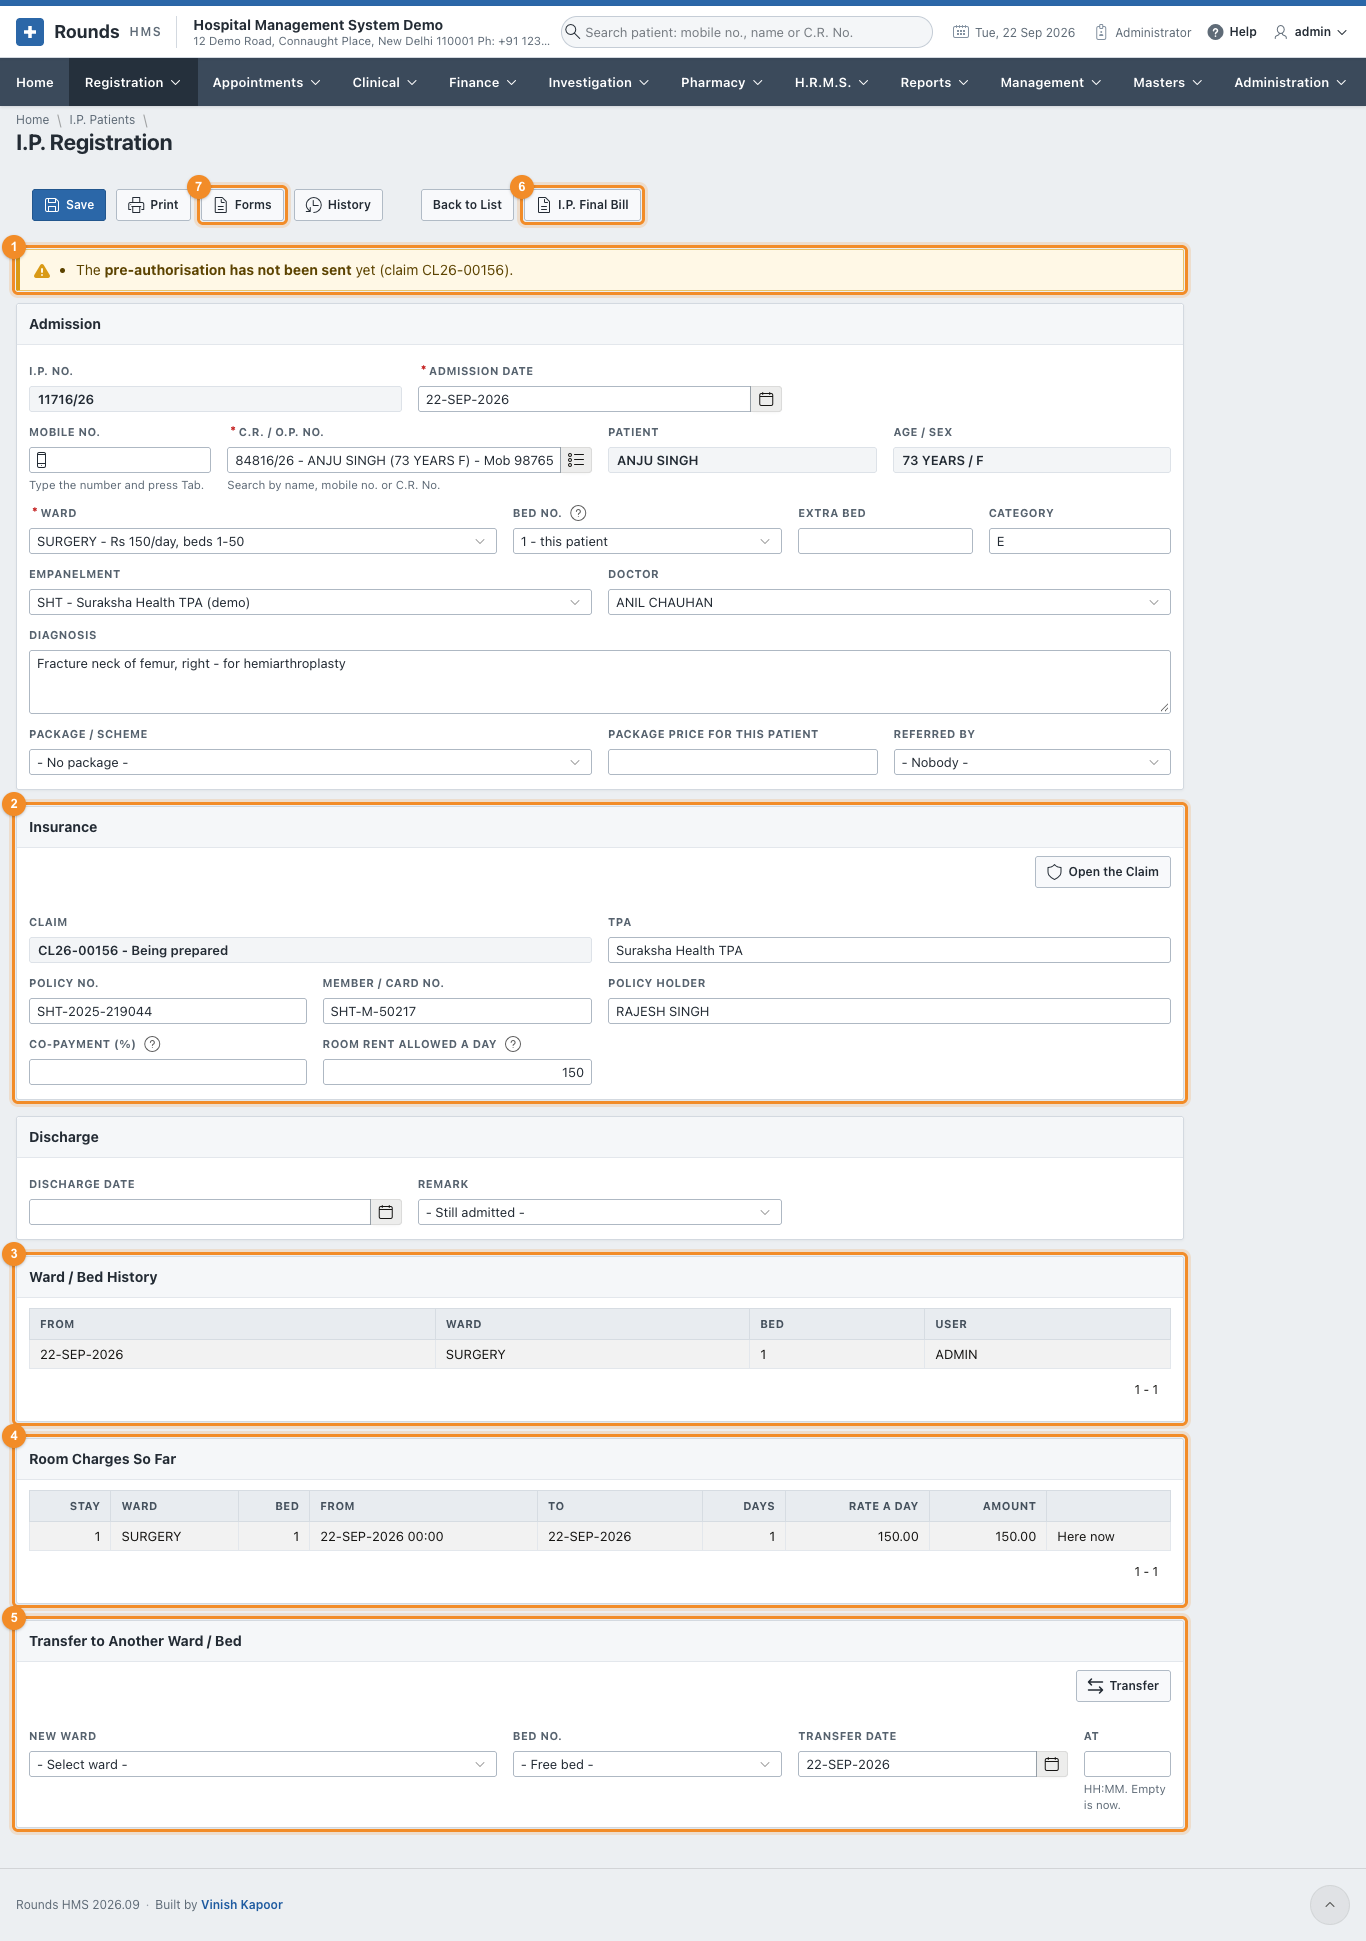
- 1 What needs attention on an insured admission, in yellow at the top:
- the pre-authorisation not sent yet;
- waiting for the insurer, and for how many days;
- a query from the insurer to answer;
- a refusal;
- room charges so far that are already more than the amount approved;
- an insurer whose contract has ended or that is inactive.
- 2 Insurance: the claim and the policy (above).
- 3 Ward / Bed History: every ward and bed the patient has been in, from which day, and who moved them.
- 4 Room Charges So Far: the days in each ward and bed at its daily rate, up to today. Here now marks the current bed.
- 5 Transfer to Another Ward / Bed: see below.
- 6 I.P. Final Bill: opens the final bill of this admission in Finance. Saving the final bill discharges the patient.
- 7 Forms: prints a consent, a referral letter or another form for this patient, filled in with the admission's details (see Clinical > Consents and Forms).
- Print prints the admission slip.
Transfer to another ward or bed
- In Transfer to Another Ward / Bed, choose the New Ward, then the Bed No. from its free beds.
- Check the Transfer Date. At is the time (HH:MM); leave it empty for now.
- Click Transfer.
The move is added to the bed history. The room charges count the old bed up to the move and the new one from then on.
Discharge
The usual way is the I.P. Final Bill: saving it discharges the patient. To record a discharge without a bill (for example, a patient who left against advice), fill in Discharge and Save:
- Discharge Date;
- Remark: Discharged, LAMA (left against medical advice), Referred, Absconded, Expired or DOPR.
Something went wrong?
- The bed I want is not in the list: somebody is in it, or it is kept for somebody else. The Bed Board shows who; release a reservation there if it is no longer needed.
- "Bed ... has ... in it" on saving: another desk gave that bed a moment earlier. Choose another.
- The doctor is empty: the patient's registration has no doctor. Choose one; the patient's next screens will then suggest it.