New O.P. Registration
Register a patient who comes to the hospital for the first time. The patient gets a C.R. No. and a bill for the registration fee.
Open Registration > New O.P. Registration, or click the New O.P. Registration tile on the Home page.
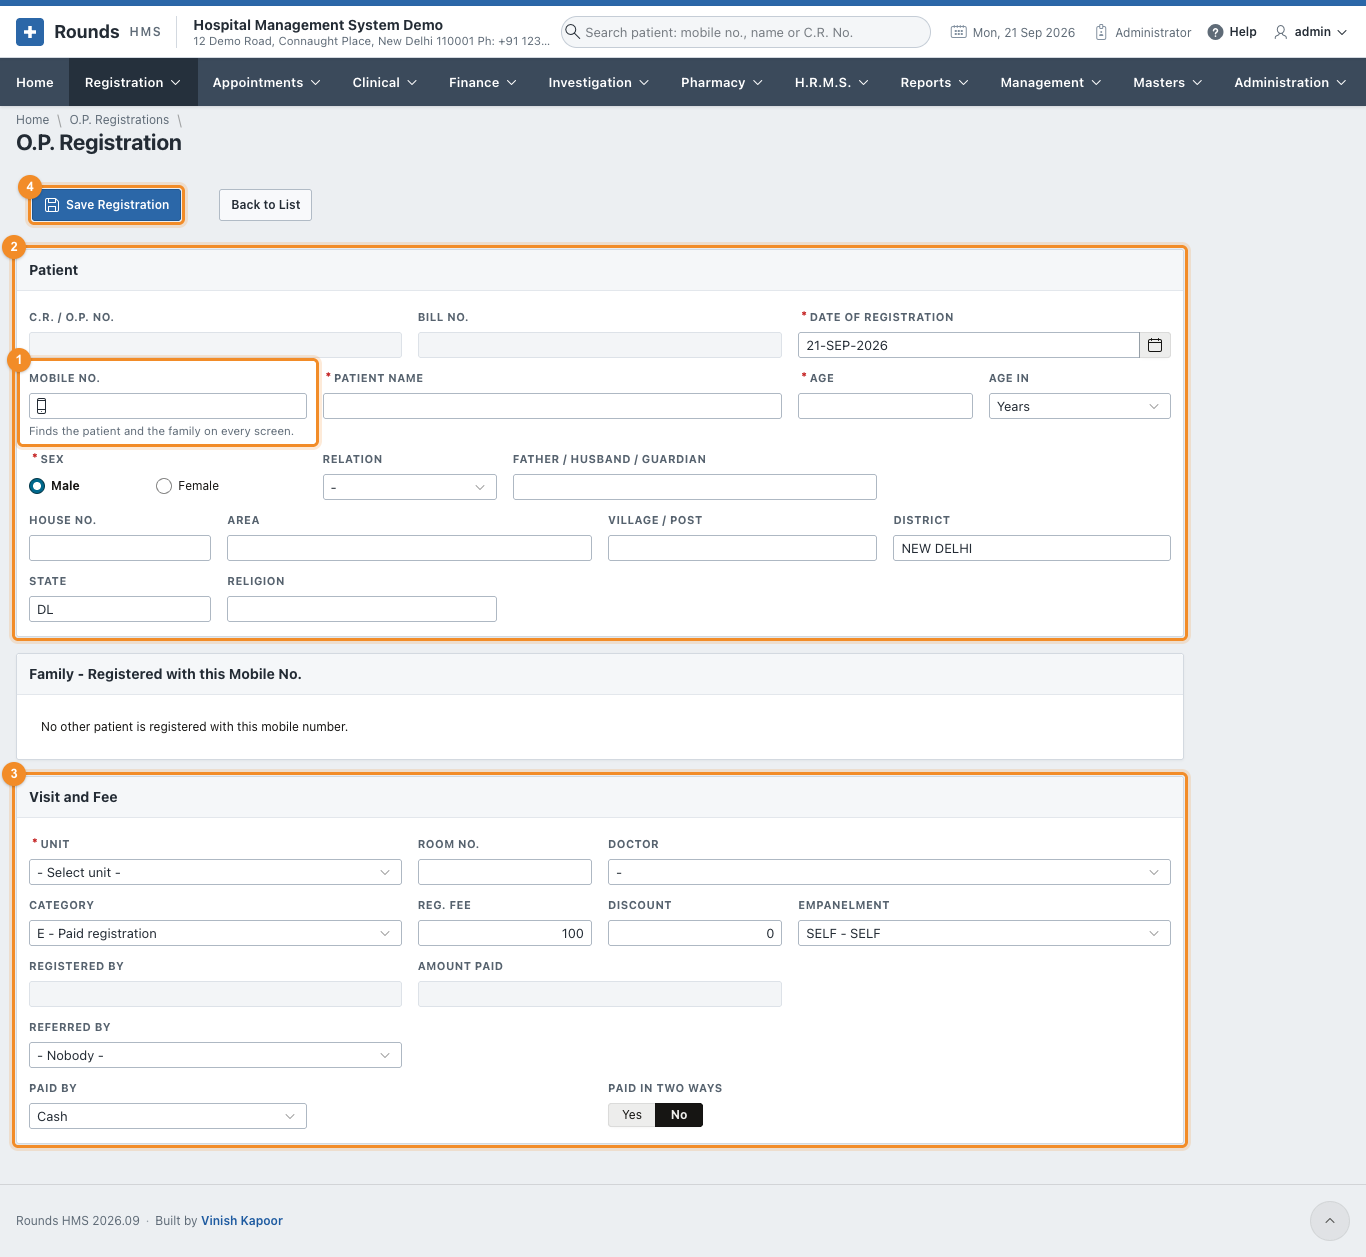
The form has three parts:
- 1 Mobile No.: start here;
- 2 Patient: who the patient is;
- 3 Visit and Fee: which unit and doctor the patient sees, and how the fee is paid.
4 Save Registration saves the form.
Step 1 - the mobile number
Type the patient's mobile number in Mobile No. and press Tab.
- Nobody has this number yet. Nothing opens. Go on to step 2.
- The number is already registered. A list of the patients with this number opens:
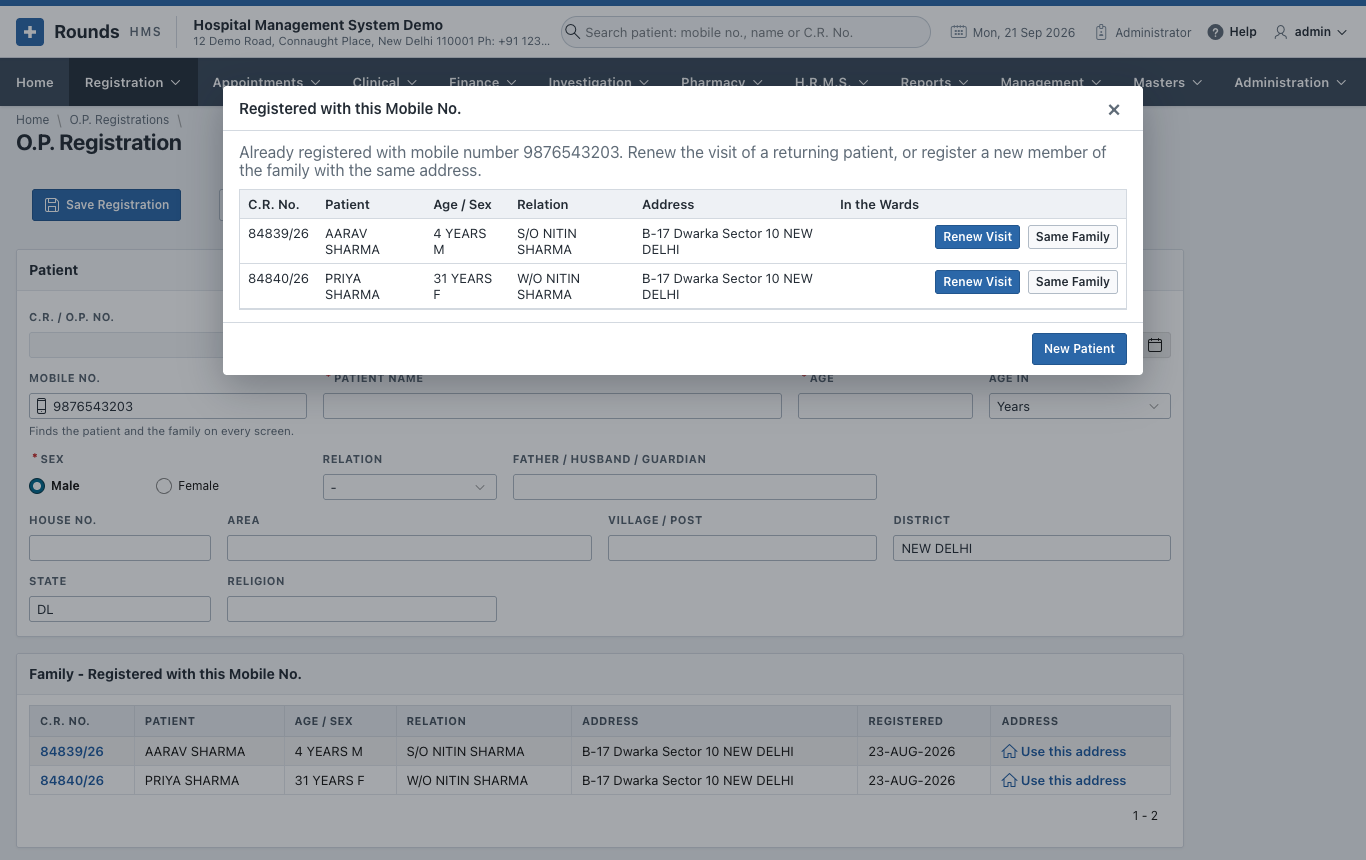
Choose one of three:
| Button | When |
|---|---|
| Renew Visit | The patient in this row has come again. You are taken to Renew Registration. Do not register them a second time. |
| Same Family | A new member of this family, e.g. a child of a registered mother. The address is copied from this row; fill in the name, age and sex. |
| New Patient | Someone else who happens to use the same phone. The form stays empty. |
The Family - Registered with this Mobile No. panel under the form keeps showing the family while you work. Its Use this address link copies an address at any time.
Step 2 - the patient
Fill in:
- Patient Name, Age, Age In (years, months or days) and Sex (required);
- Relation (S/O, D/O, W/O ...) and Father / Husband / Guardian;
- House No., Area, Village / Post, District and State. District and State start with the defaults set in Administration > Hospital Details (e.g. New Delhi, DL). Without them, they start with the place of the patient registered last.
Duplicate check
When the name and the guardian are filled in, a warning appears next to the name if a patient with the same name and guardian is already registered (Possible duplicate). Check the Patient History before you save.
Step 3 - the visit and the fee
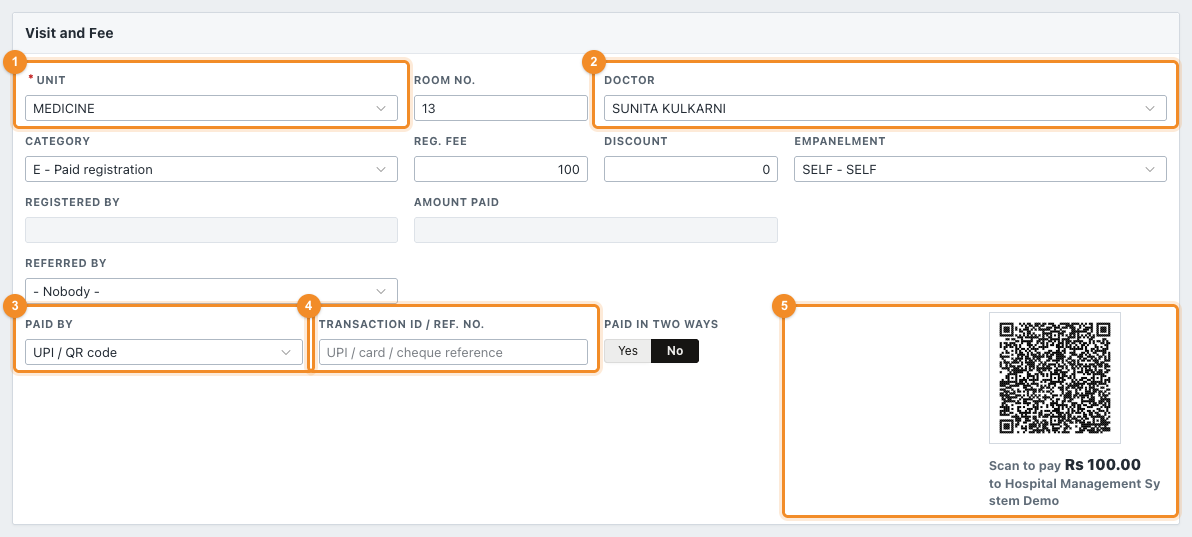
- 1 Unit: the department the patient will see (Medicine, Surgery, Obst / Gynae ...). Its Room No. fills in.
- 2 Doctor: the doctor of the visit. This doctor is filled in automatically on the patient's later screens (bills, lab orders, admission), where it can still be changed.
- Category:
- E - Paid registration: the usual case;
- F - Free registration: no fee;
- N - Provisional: a registration completed later;
- C - Paid (receipt form): paid on the printed receipt form.
- Reg. Fee comes from the hospital's settings. A Discount lowers what the patient pays.
- Empanelment: SELF for a patient who pays, or the company / scheme that pays for the patient.
- Referred By: the clinic or doctor who sent the patient, if any. It decides the referral share (Finance > Doctor and Referral Shares).
- 3 Paid By: cash, UPI / QR code, card, wallet, payment link, bank transfer or cheque.
- 4 Transaction ID / Ref. No.: for anything other than cash, the UPI reference, the card approval code or the cheque number.
- 5 UPI QR Code: with UPI / QR code, a QR code of the exact amount appears. The patient scans it with any UPI app; type the UPI reference the patient's app shows into Transaction ID.
The UPI QR code needs the hospital's UPI ID
The QR code pays the UPI ID set in Administration > Hospital Details. Without one, no code is shown.
Paid in two ways
A patient may pay part by UPI and the rest in cash. Turn Paid in Two Ways to Yes:
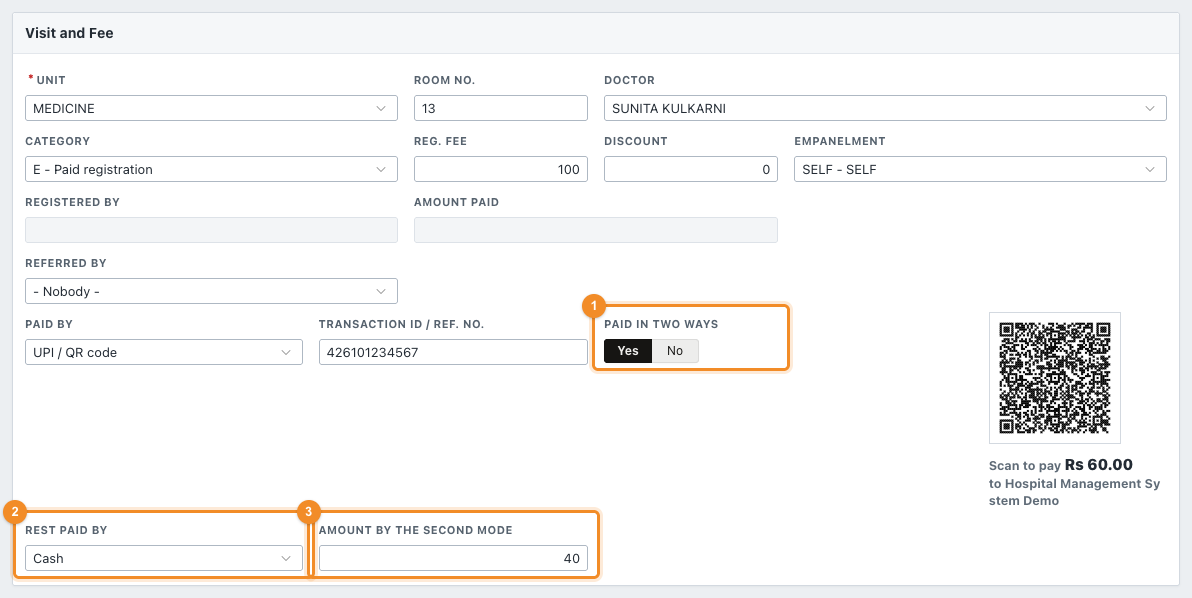
- 1 Paid in Two Ways: Yes.
- 2 Rest Paid By: the second mode, e.g. Cash.
- 3 Amount by the Second Mode: the part paid that way. The QR code changes to the UPI part only.
Step 4 - save and print
Click Save Registration. The patient gets 1 a C.R. / O.P. No. and 2 a Bill No. for the fee.
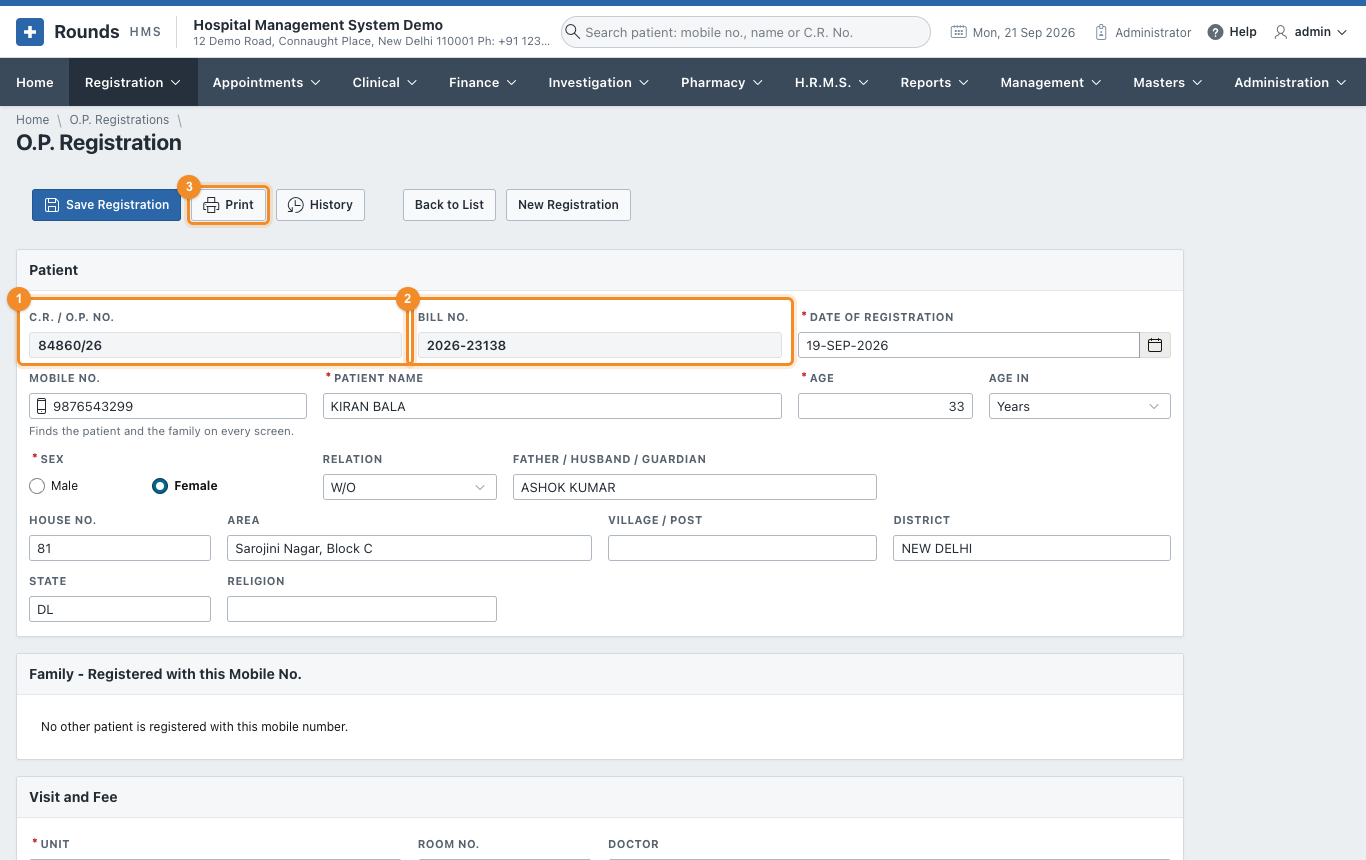
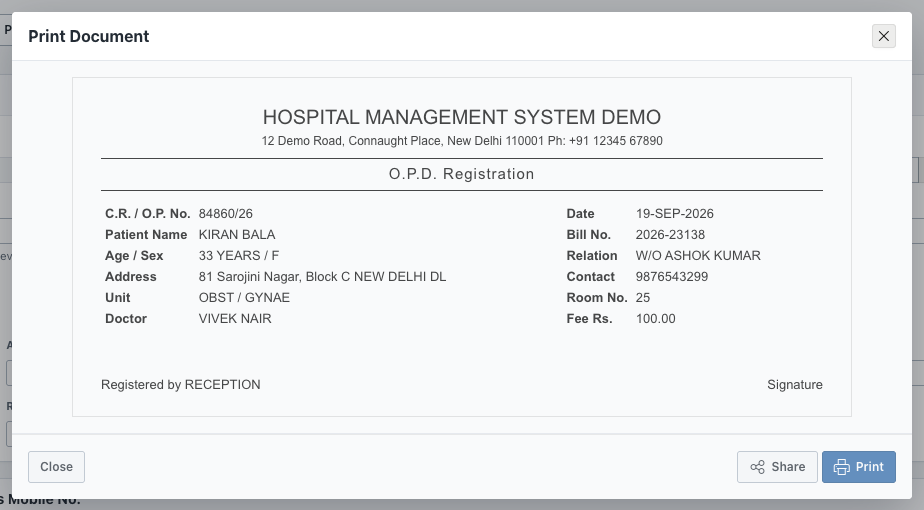
3 Print shows the O.P. slip with the fee receipt. Print in that window sends it to the printer, and Share sends it as a PDF. The patient takes the slip to the doctor.
New Registration clears the form for the next patient.
The list of registrations
Registration > O.P. Registrations lists every registration, newest first:
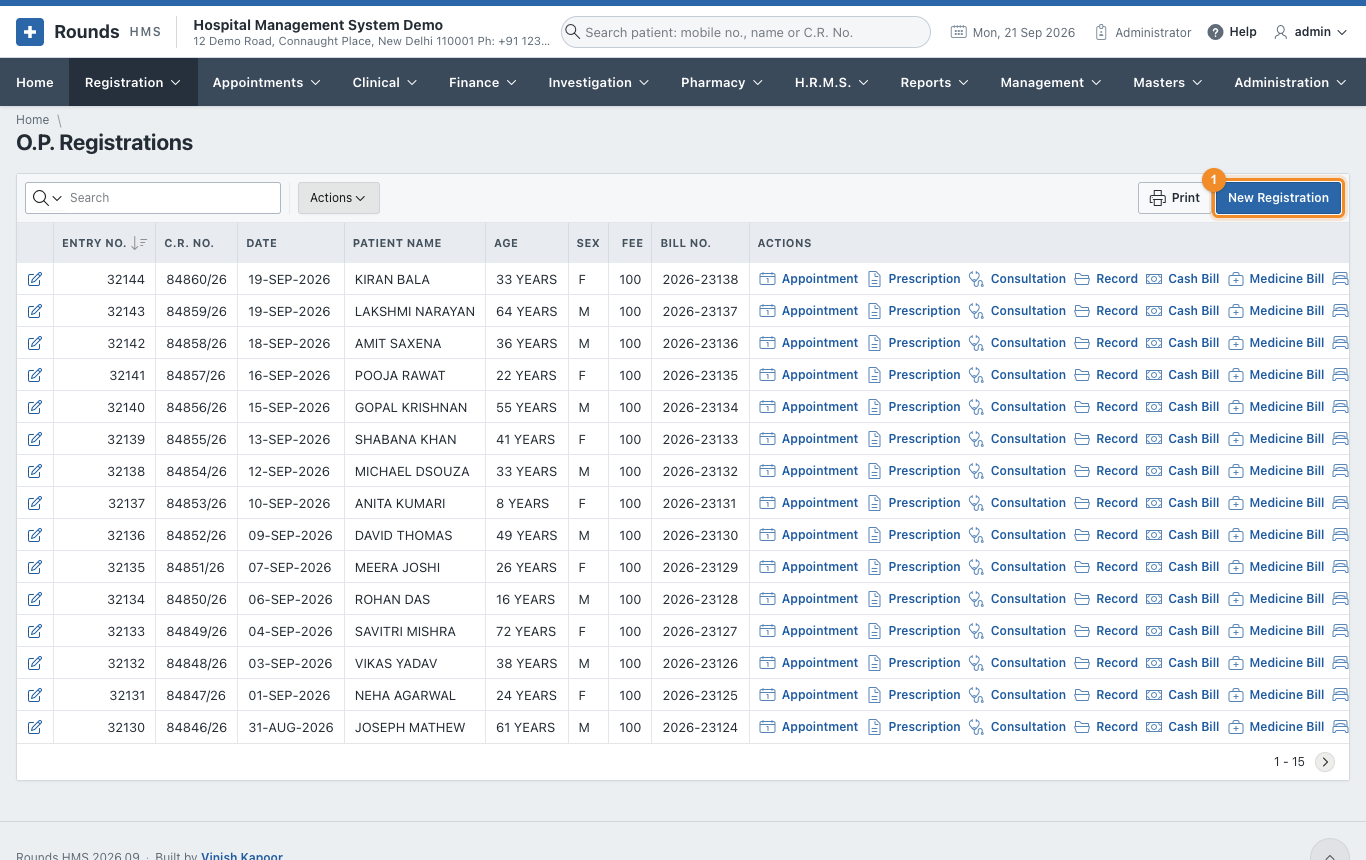
- Click the pencil of a row to open the registration and correct it.
- 1 New Registration opens an empty form.
- Print prints the list as it is filtered.
- Actions filters, sorts and chooses columns, and downloads the list as Excel, CSV or PDF.
Something went wrong?
- "Enter the 10-digit mobile number, or leave it empty.": the number is too short or too long. Leave it empty if the patient has no phone.
- The patient was registered twice: open the newer registration and correct it, or ask the administrator. Use Renew Visit next time the patient comes.